Post by Rita (2)

The Ultimate Guide to Making Delicious Homemade Hamburgers
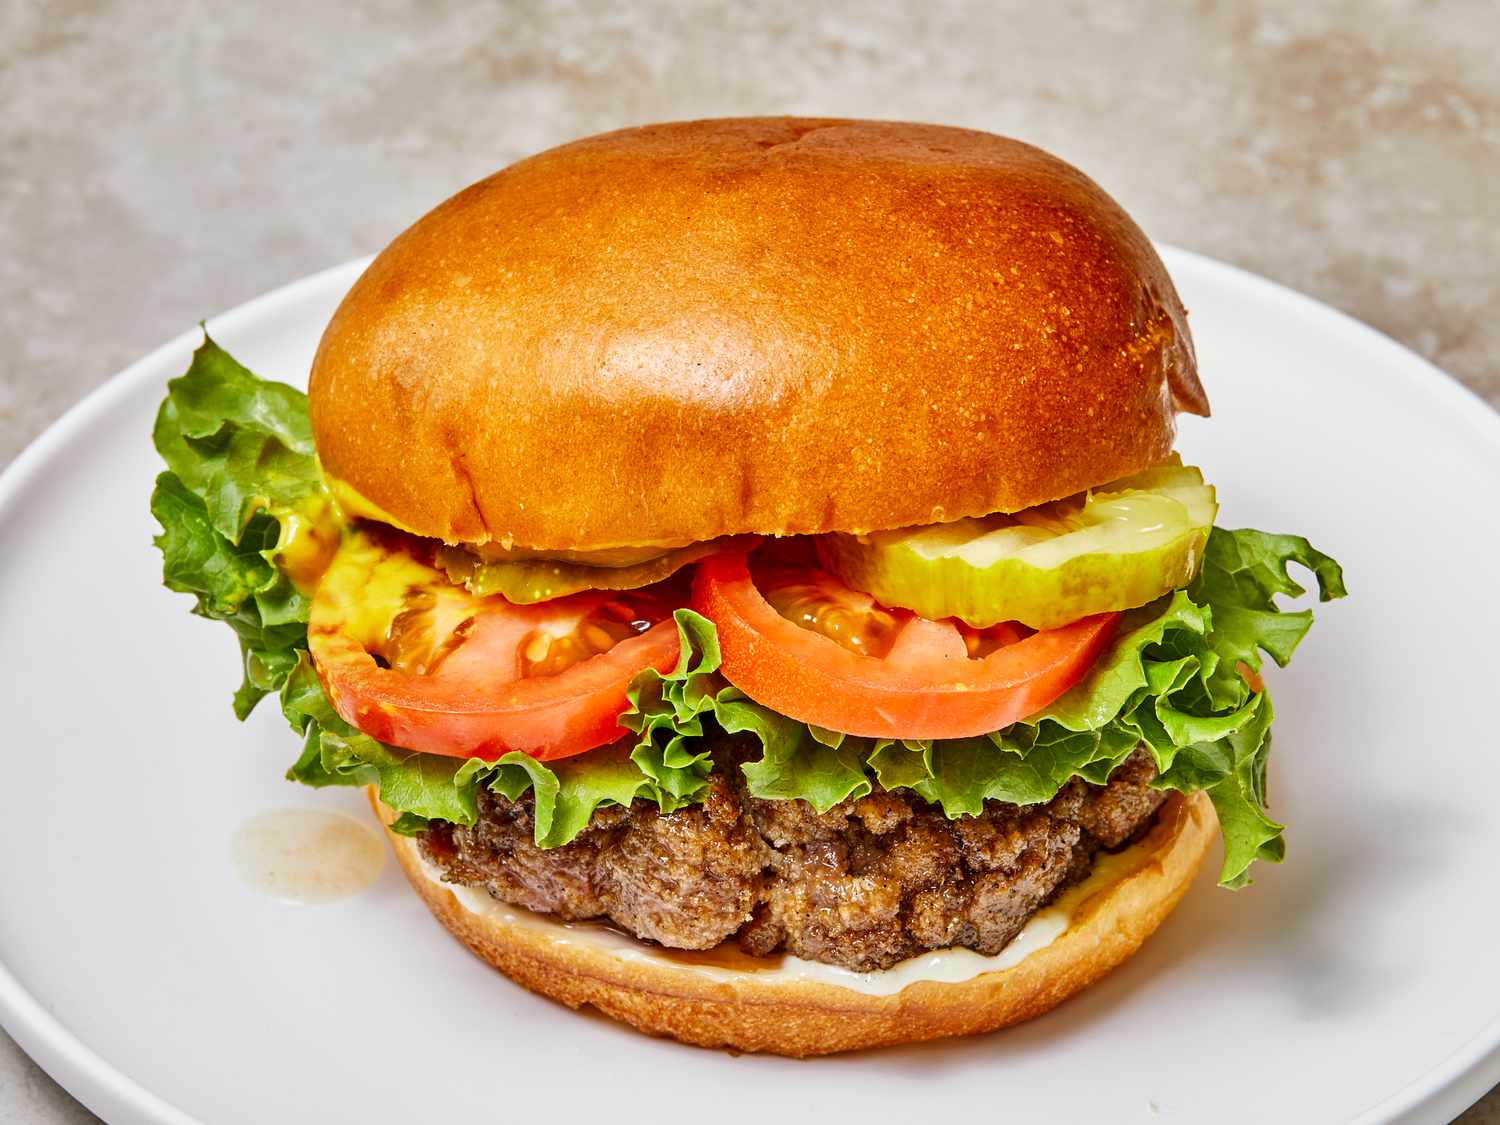
The Ultimate Guide to Making Delicious Homemade Hamburgers

Hamburgers are a beloved staple of American cuisine, known for their juicy beef patties, soft buns, and endless possibilities for toppings. Whether enjoyed at a summer barbecue, a casual dinner, or a gourmet restaurant, the hamburger remains a symbol of comfort and satisfaction. But making the perfect hamburger at home is an art that requires attention to detail, quality ingredients, and a little bit of creativity. In this comprehensive guide, we’ll walk you through everything you need to know to make mouthwatering hamburgers from scratch. From selecting the best meat to mastering the grilling process, we’ll cover it all, along with tips for crafting delicious toppings and assembling your burger to perfection. The Origins of the Hamburger The history of the hamburger is as rich and varied as the dish itself. While the concept of placing a beef patty between bread has roots in various cultures, the modern hamburger as we know it today is believed to have originated in the United States in the late 19th or early 20th century. It quickly became popular due to its convenience, flavor, and adaptability, making it a favorite across the globe. Ingredients for the Perfect Hamburger For the Patty: Ground Beef: 1.5 pounds of ground beef (preferably 80% lean, 20% fat) Salt: 1 teaspoon Black Pepper: 1/2 teaspoon Garlic Powder: 1/2 teaspoon (optional) Onion Powder: 1/2 teaspoon (optional) For the Bun: Hamburger Buns: 4 large, soft buns (brioche or sesame seed buns work great) Butter: 2 tablespoons (for toasting the buns) For the Toppings: Cheese: 4 slices of cheddar, American, or Swiss cheese Lettuce: Fresh, crisp leaves (romaine or iceberg) Tomato: 1 large tomato, sliced Onion: 1 red or white onion, sliced into rings Pickles: Dill pickle slices Ketchup: To taste Mustard: To taste Mayonnaise: To taste Bacon: 4 slices, cooked until crispy (optional) Avocado: Sliced (optional) Fried Egg: 1 egg per burger (optional, for a gourmet twist) Step-by-Step Guide to Making Hamburgers 1. Choosing the Right Meat The foundation of a great hamburger is the patty, and the key to a juicy, flavorful patty is the right meat. Ground beef with an 80/20 ratio of lean meat to fat is ideal. The fat content ensures that the patty remains moist and flavorful during cooking. You can also experiment with blends, such as mixing ground chuck, brisket, and short rib for a richer taste. 2. Preparing the Patties Start by dividing the ground beef into equal portions, usually around 6 ounces per patty. Gently shape the meat into round patties, about 3/4 inch thick. Avoid overworking the meat, as this can make the patties tough. Once shaped, use your thumb to create a small indentation in the center of each patty. This helps the patty cook evenly and prevents it from puffing up during grilling. 3. Seasoning the Patties Season both sides of the patties generously with salt and pepper. If you like, you can also add a sprinkle of garlic powder and onion powder for an extra layer of flavor. Seasoning is best done just before cooking to retain moisture in the meat. 4. Cooking the Patties You can cook hamburgers on a grill, stovetop, or even in an oven. Here’s how to do it on a grill: Preheat the Grill: Heat your grill to medium-high, around 375-400°F (190-200°C). Make sure the grates are clean and lightly oiled to prevent sticking. Grill the Patties: Place the patties on the grill and cook for about 4-5 minutes on the first side, without pressing down on them. Flip and cook for another 3-4 minutes for medium doneness. Adjust the cooking time if you prefer your burgers more or less done. Add Cheese: If you’re making cheeseburgers, add a slice of cheese to each patty during the last minute of cooking. Close the grill lid to allow the cheese to melt. For stovetop cooking, heat a cast-iron skillet over medium-high heat and follow the same cooking times as grilling. For oven cooking, preheat to 375°F (190°C) and bake the patties on a baking sheet for about 20 minutes, flipping halfway through. 5. Toasting the Buns While the patties are cooking, you can prepare the buns. Spread a thin layer of butter on the cut sides of each bun. Place the buns cut side down on the grill or in a skillet over medium heat. Toast for 1-2 minutes until they are golden brown and slightly crispy. Toasting adds texture and helps prevent the buns from getting soggy. 6. Assembling the Hamburger Once the patties are cooked and the buns are toasted, it’s time to assemble your burgers. Start by spreading your preferred condiments on the bottom half of the bun. Layer on lettuce, tomato slices, and pickles. Place the patty on top, followed by onion rings, bacon, or any other toppings you desire. Top it off with the other half of the bun. 7. Adding a Gourmet Twist For a more gourmet experience, consider adding avocado slices, a fried egg, or even caramelized onions. These toppings add richness and complexity to your burger, making it a truly indulgent treat. 8. Serving Your Hamburgers Serve your hamburgers hot, with a side of crispy French fries, onion rings, or a fresh salad. You can also pair your burger with a cold beverage like soda, iced tea, or even a craft beer. Tips for the Perfect Hamburger 1. Don’t Overwork the Meat: Handling the meat too much can result in tough patties. Be gentle when forming the patties and avoid pressing down on them while cooking. 2. Keep the Grill Lid Closed: Closing the grill lid helps maintain a consistent temperature and ensures that your burgers cook evenly. 3. Let the Patties Rest: After cooking, let the patties rest for a couple of minutes before assembling the burgers. This allows the juices to redistribute, making the burgers juicier. 4. Experiment with Toppings: While the classic toppings are always a hit, don’t be afraid to get creative. Try adding sautéed mushrooms, different cheeses, or even a slice of grilled pineapple for a unique twist. 5. Use Fresh Ingredients: The quality of your ingredients makes a big difference. Use fresh lettuce, ripe tomatoes, and high-quality beef to ensure the best flavor. Nutritional Information and Health Considerations Hamburgers can be part of a balanced diet when enjoyed in moderation and with mindful choices. Opting for leaner beef, whole-grain buns, and plenty of vegetables can make your burger healthier. You can also use ground turkey, chicken, or plant-based patties as alternatives to beef. Calories: A basic hamburger with a beef patty, bun, and standard toppings contains around 500-700 calories. Adding cheese, bacon, or extra sauces increases the calorie count. Protein: Hamburgers are an excellent source of protein, providing about 20-30 grams per serving, depending on the size of the patty. Fat: The fat content varies based on the type of meat used. Ground beef with 20% fat is higher in calories and saturated fat, but it contributes to the burger's juiciness. Carbohydrates: The bun is the main source of carbohydrates in a hamburger, contributing around 30-40 grams per serving. Whole-grain buns are a healthier option, offering more fiber. Conclusion Hamburgers are a versatile and universally loved dish that can be customized to suit any taste. Whether you prefer a simple cheeseburger or a gourmet creation loaded with unique toppings, the key to a great burger lies in quality ingredients and careful preparation. By following the steps outlined in this guide, you can create delicious, restaurant-quality hamburgers right in your own kitchen. So fire up the grill, gather your favorite toppings, and enjoy the satisfaction of making the perfect hamburger from scratch. Remember, the best hamburgers are the ones made with care, creativity, and a love for good food. Enjoy!
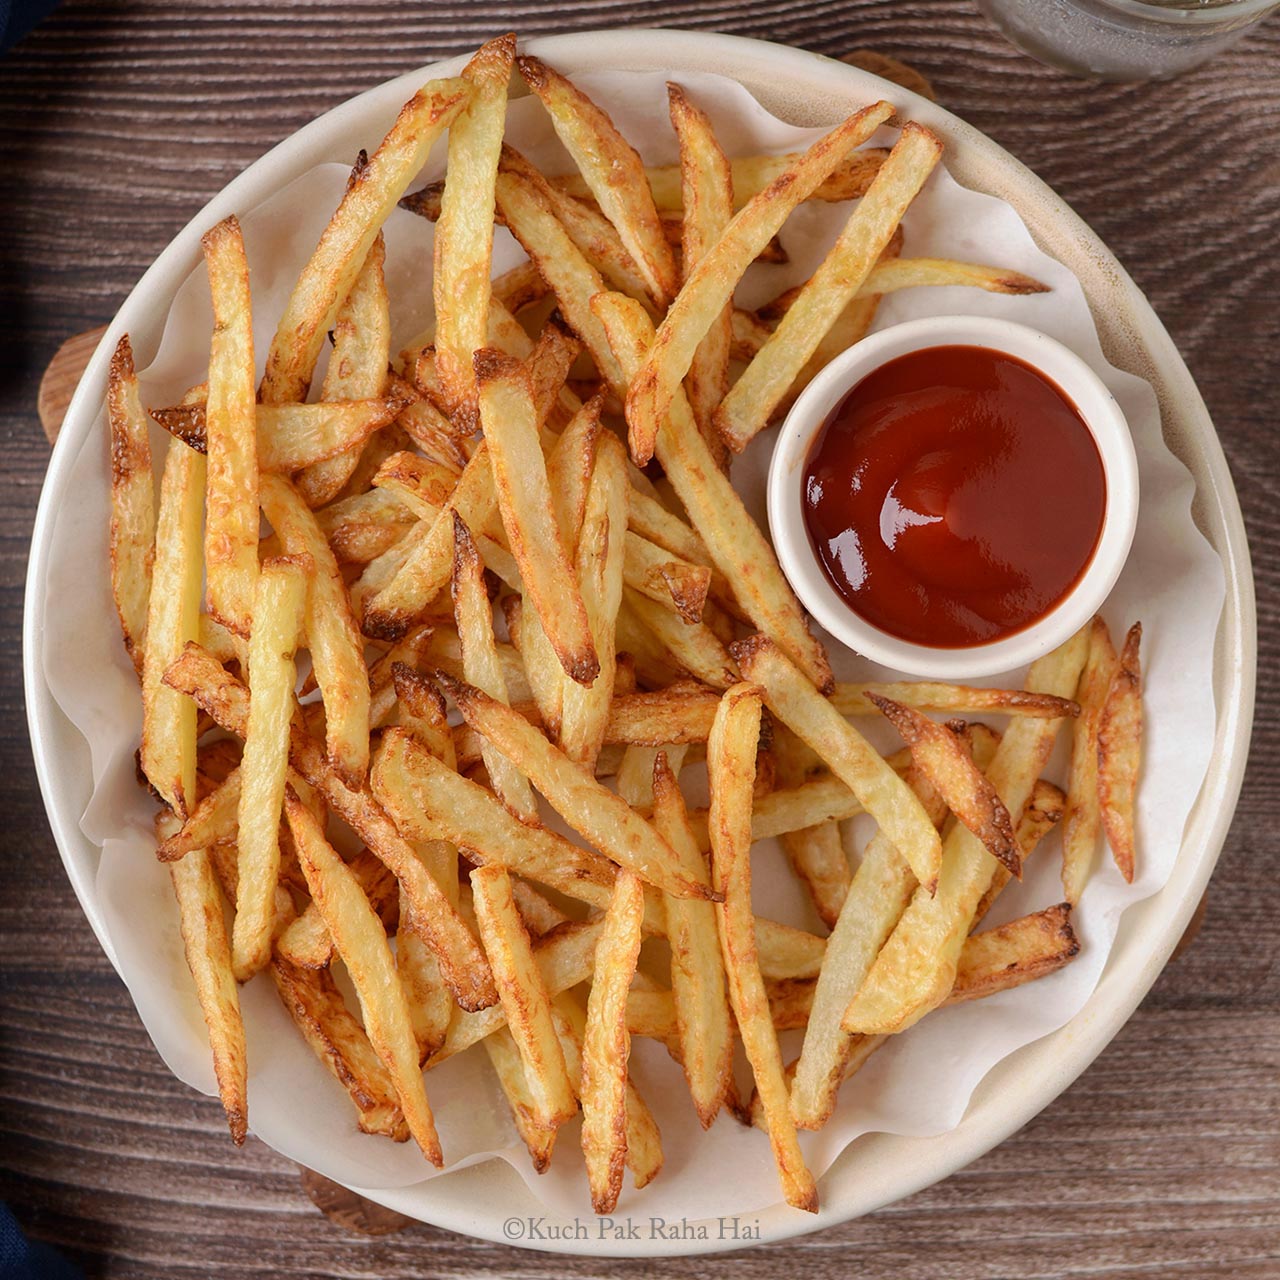
The Ultimate Guide to Perfect French Fries: Crispy, Golden, and Delicious

The Ultimate Guide to Perfect French Fries: Crispy, Golden, and Delicious

French fries are a global favorite, a beloved side dish or snack that transcends borders and cultures. Whether you’re at a fast-food restaurant, a gourmet bistro, or enjoying a homemade meal, French fries have a way of making any dish better. But making the perfect French fries at home can be a challenge. Achieving that perfect balance of a crispy exterior and a fluffy, tender interior requires more than just cutting up potatoes and frying them in oil. In this post, we’ll walk you through everything you need to know to make the best homemade French fries. From selecting the right potatoes to mastering the frying technique, this guide will help you create fries that are crispy, golden, and utterly delicious. The Origins of French Fries Before we dive into the recipe, let's take a brief look at the history of French fries. Despite the name, French fries are believed to have originated in Belgium, where potatoes were fried in the late 1600s. According to legend, villagers along the Meuse River traditionally fried small fish they caught in the river, but when the river froze over during the winter, they turned to potatoes as a substitute. These early potato fries eventually made their way to France, where they were popularized and became known as "frites." French fries gained international fame in the 20th century, particularly in the United States, where they are now a staple in fast food and a beloved part of American cuisine. Today, French fries are enjoyed all over the world in various forms, from shoestring fries to thick-cut steak fries, seasoned with everything from salt and pepper to truffle oil and Parmesan cheese. Selecting the Right Potatoes The first step to making perfect French fries is choosing the right type of potato. Not all potatoes are created equal, and the type you use can make a big difference in the texture and flavor of your fries. Here are the best options: Russet Potatoes: Also known as Idaho potatoes, russets are the most popular choice for French fries. They have a high starch content and low moisture, which makes them ideal for frying. Russet potatoes produce fries that are crispy on the outside and fluffy on the inside. Yukon Gold Potatoes: If you prefer fries with a creamier interior, Yukon Gold potatoes are a great option. They have a slightly lower starch content than russets, resulting in a softer texture. Yukon Golds also have a naturally buttery flavor, which can add richness to your fries. Sweet Potatoes: For a healthier alternative, you can use sweet potatoes. They are packed with vitamins and minerals and have a natural sweetness that pairs well with savory seasonings. Sweet potato fries tend to be softer and less crispy than regular fries, but they are still delicious. Preparing the Potatoes Once you’ve selected your potatoes, the next step is to prepare them for frying. Here’s how to do it: Wash and Peel the Potatoes: Start by washing the potatoes thoroughly under cold water to remove any dirt. If you prefer, you can peel the potatoes, but leaving the skin on can add extra flavor and texture to your fries. Cut the Potatoes: Use a sharp knife or a French fry cutter to slice the potatoes into even strips. The size of your fries is up to you—shoestring fries are thin and crispy, while thicker fries have a more substantial bite. Aim for uniformity so that the fries cook evenly. Soak the Potatoes: One of the secrets to crispy French fries is soaking the cut potatoes in cold water. This step removes excess starch, which can cause the fries to become soggy. Place the cut potatoes in a large bowl of cold water and let them soak for at least 30 minutes, or up to 2 hours. For extra crispiness, you can add a tablespoon of vinegar to the water. Drying and Par-Frying After soaking, it’s important to dry the potatoes thoroughly before frying. Wet potatoes can cause the oil to splatter and prevent the fries from crisping up properly. Drain and Dry the Potatoes: Drain the soaked potatoes and pat them dry with a clean kitchen towel or paper towels. Make sure they are completely dry before frying. Par-Fry the Potatoes: Par-frying is a technique that involves partially cooking the fries at a lower temperature before frying them at a higher temperature. This two-step process helps to create a crispy exterior while keeping the interior tender. Heat oil in a deep fryer or large, heavy-bottomed pot to 325°F (165°C). Fry the potatoes in batches for 3-5 minutes, until they are pale and just beginning to soften. Do not overcrowd the pot, as this can lower the oil temperature and result in greasy fries. Remove the fries from the oil and drain them on a paper towel-lined tray. The Final Fry The final fry is where your French fries will achieve their golden, crispy perfection. Increase the Oil Temperature: Heat the oil to 375°F (190°C) for the second fry. This higher temperature will create a crispy exterior while sealing in the moisture inside. Fry the Potatoes in Batches: Fry the par-cooked potatoes in batches for 2-4 minutes, or until they are golden brown and crispy. Keep an eye on them, as they can go from golden to burnt quickly. Stir the fries occasionally to ensure even cooking. Drain and Season: Once the fries are cooked to your liking, remove them from the oil and drain them on fresh paper towels. While the fries are still hot, season them generously with salt. You can also add other seasonings, such as garlic powder, paprika, or herbs, for extra flavor. Serving Suggestions French fries are incredibly versatile and can be served in a variety of ways. Here are some ideas to elevate your fries: Classic Pairing: Serve your fries with ketchup, mayonnaise, or a combination of both. For a tangy twist, try dipping them in mustard or aioli. Loaded Fries: Top your fries with melted cheese, crispy bacon, green onions, and sour cream for a loaded fries experience. You can also add chili or pulled pork for a heartier dish. Gourmet Fries: Sprinkle your fries with truffle oil and Parmesan cheese for a luxurious touch. You can also add fresh herbs like rosemary or thyme for an aromatic flavor. Sweet Potato Fries: If you made sweet potato fries, try serving them with a cinnamon sugar sprinkle or a spicy chipotle dip. Tips for Perfect French Fries Use Fresh Oil: For the best results, use fresh, clean oil for frying. Old oil can impart an off-flavor to your fries and cause them to burn more quickly. Maintain the Right Temperature: Use a thermometer to monitor the oil temperature. Frying at too low a temperature can result in greasy fries, while frying at too high a temperature can cause the fries to burn. Don’t Overcrowd the Pot: Fry the potatoes in small batches to ensure they cook evenly and maintain the right oil temperature. Double Fry for Extra Crispiness: The double frying technique is key to achieving that perfect crispy texture. Don’t skip the par-fry, as it helps to create the ideal contrast between the crispy exterior and the tender interior. Serve Immediately: French fries are best enjoyed fresh and hot. Serve them immediately after frying for the best texture and flavor. Nutritional Information While French fries are undoubtedly delicious, they are also high in calories and fat due to the frying process. Here’s a rough estimate of the nutritional content of a typical serving of French fries: Calories: Approximately 365 calories per medium serving (about 117g) Fat: 17g, including 2.3g of saturated fat Carbohydrates: 48g, including 4g of dietary fiber and 1g of sugar Protein: 4g Sodium: Varies depending on the amount of salt added For a healthier option, you can try baking your fries instead of frying them. While baked fries won’t be as crispy as their fried counterparts, they can still be delicious with the right seasoning and cooking method. Conclusion Making perfect French fries at home is an art that requires patience and attention to detail. By choosing the right potatoes, mastering the frying technique, and seasoning them just right, you can create fries that are crispy, golden, and irresistible. Whether you’re serving them as a side dish, a snack, or a gourmet treat, these homemade French fries are sure to be a hit with friends and family. So, roll up your sleeves, heat up that oil, and get ready to enjoy the ultimate homemade French fries experience!

1

Stay Organized

Enhance your culinary journey with these useful features:

  • Event Calendar: Plan your cooking sessions, meal preps, and grocery shopping trips effortlessly.
  • Weather Forecast: Check the weather forecast to adjust your cooking plans according to the conditions outside.
  • Location Services: Discover nearby grocery stores, farmer's markets, and culinary events with integrated maps.